- Fri Feb 12, 2010 4:10 pm
#93378
When I build prototype boards (New UBW32 versions for example) I design the boards in Eagle and then send them to Gold Phoenix or BatchPCB to be fabbed. They send me the raw boards back. Then I need to solder the components on. Many of you guys/gals do this too.
I sometimes hand solder everything on. But it takes a while. If I need to make a number of boards, I need to get a solder paste stencil made.
The first one I tried was the mylar one made at Polou.com. http://www.pololu.com/catalog/product/446 While it did work, there were burrs on the edges of all of the holes. I couldn't get the stencil to work really well (i.e. nice sharp past edges) until I trimmed some of these burrs with an Xacto knife.
So recently I needed to make a number of boards (including some UBW32s) and I saw a video up at Adafruit that shows Lady Ada using a kapton stencil. Looking around a bit, I find that http://ohararp.com/Stencils.html will make them for you, for a pretty reasonable price too. So I tried them out.
I had 6 different boards that were in the panel Gold Phoenix made for me, and so I sent a single gerber file created by taking each of the six boards, arranging them with some space between them, and drawing boxes around them in the _tsilk layer. Then I output just the tCream layer and _tsilk layer and got a single gerber with holes for the solder paste. The boxes around each board allowed Ohararp to automatically have their laser cut out each board's stencil.
I ordered on Tuesday and got the stencils on Friday for $32.55 including shipping. You can get up to 8.5" x 11" worth of Kapton for this price I guess.
How did it work? Great! There were no burrs, and it went very smoothly. It seemed like there was not enough paste being deposited (compared with the mylar stencils I had used before, which were a little thicker) but all of my parts reflowed perfectly, so the thickness was just fine. Beautiful little fillets on each pin.
One hint is to clean the top and bottom of the stencil after every couple boards with IPA. Because I didn't use the stencil in any kind of a frame, solder paste would slowly get underneath it and so future 'scrapes' would get less and less defined edges of paste. Cleaning solved this problem.
I had some problems because of having too much paste underneath a chip scale package (thermal pad in the middle), which was my own fault for not editing the part's footprint before having the stencil created.
Here are some pics to show you what I did:
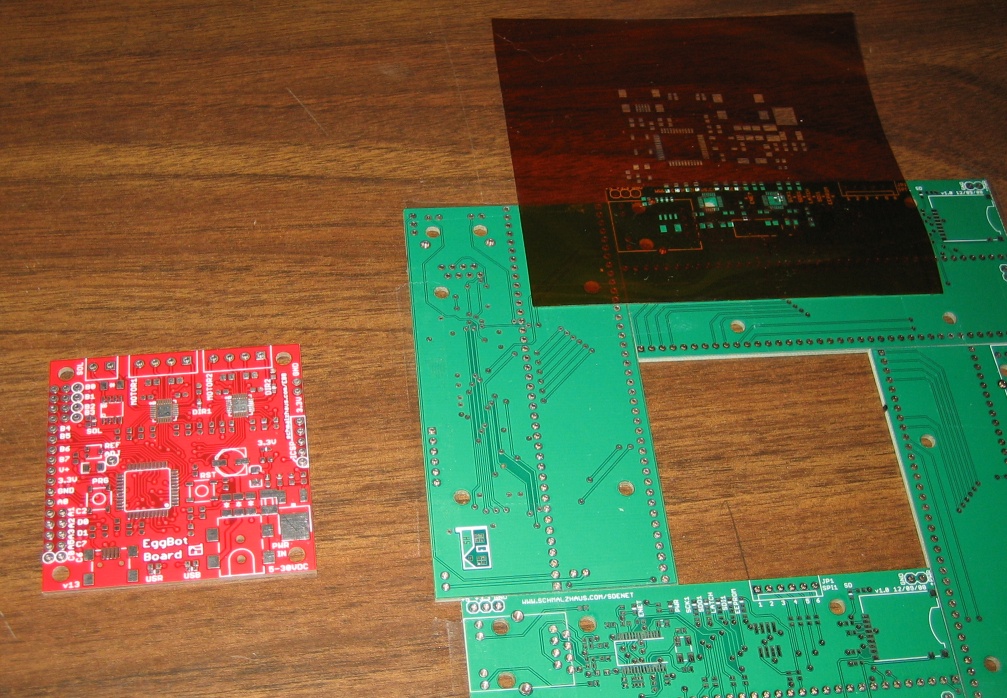
This first one shows a board ready to be stenciled. The kaptop stencil is flipped up. I just put the board in the hole (made with old boards), flip the stencil over, and squeegee on the solder paste.
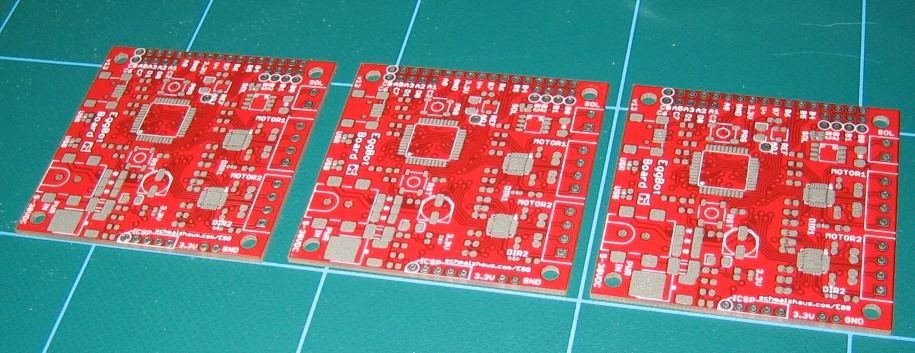
Here you can see three boards with solder paste on them ready for parts.
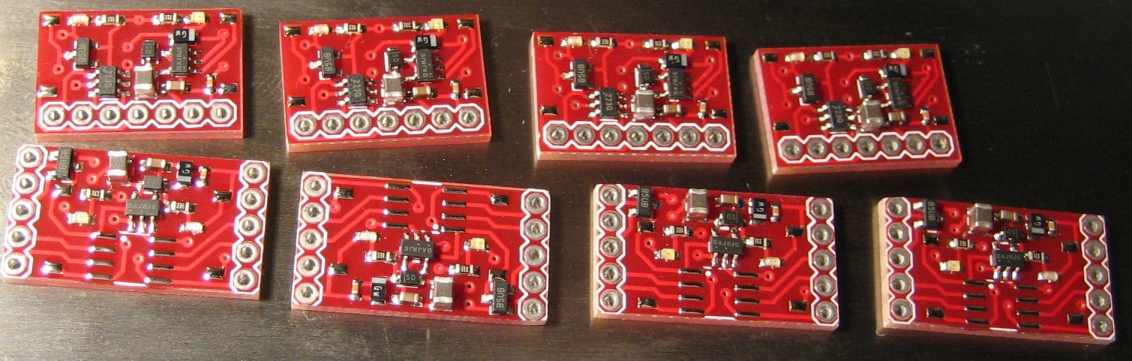
And here are some of the other boards we made that night, showing the nice joints from the reflow process.
Anyway, I don't mean this to sound like an ad or anything, but I liked this so much I thought I should let you guys all know about it and how well it works.
*Brian
I sometimes hand solder everything on. But it takes a while. If I need to make a number of boards, I need to get a solder paste stencil made.
The first one I tried was the mylar one made at Polou.com. http://www.pololu.com/catalog/product/446 While it did work, there were burrs on the edges of all of the holes. I couldn't get the stencil to work really well (i.e. nice sharp past edges) until I trimmed some of these burrs with an Xacto knife.
So recently I needed to make a number of boards (including some UBW32s) and I saw a video up at Adafruit that shows Lady Ada using a kapton stencil. Looking around a bit, I find that http://ohararp.com/Stencils.html will make them for you, for a pretty reasonable price too. So I tried them out.
I had 6 different boards that were in the panel Gold Phoenix made for me, and so I sent a single gerber file created by taking each of the six boards, arranging them with some space between them, and drawing boxes around them in the _tsilk layer. Then I output just the tCream layer and _tsilk layer and got a single gerber with holes for the solder paste. The boxes around each board allowed Ohararp to automatically have their laser cut out each board's stencil.
I ordered on Tuesday and got the stencils on Friday for $32.55 including shipping. You can get up to 8.5" x 11" worth of Kapton for this price I guess.
How did it work? Great! There were no burrs, and it went very smoothly. It seemed like there was not enough paste being deposited (compared with the mylar stencils I had used before, which were a little thicker) but all of my parts reflowed perfectly, so the thickness was just fine. Beautiful little fillets on each pin.
One hint is to clean the top and bottom of the stencil after every couple boards with IPA. Because I didn't use the stencil in any kind of a frame, solder paste would slowly get underneath it and so future 'scrapes' would get less and less defined edges of paste. Cleaning solved this problem.
I had some problems because of having too much paste underneath a chip scale package (thermal pad in the middle), which was my own fault for not editing the part's footprint before having the stencil created.
Here are some pics to show you what I did:
This first one shows a board ready to be stenciled. The kaptop stencil is flipped up. I just put the board in the hole (made with old boards), flip the stencil over, and squeegee on the solder paste.
Here you can see three boards with solder paste on them ready for parts.
And here are some of the other boards we made that night, showing the nice joints from the reflow process.
Anyway, I don't mean this to sound like an ad or anything, but I liked this so much I thought I should let you guys all know about it and how well it works.
*Brian
