SparkFun Forums 

Where electronics enthusiasts find answers.

Have questions about a SparkFun product or board? This is the place to be.
By BartAdv
#177795
Hello,

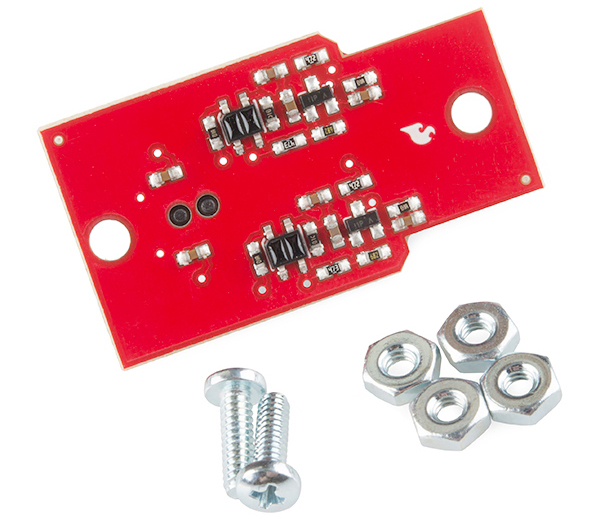
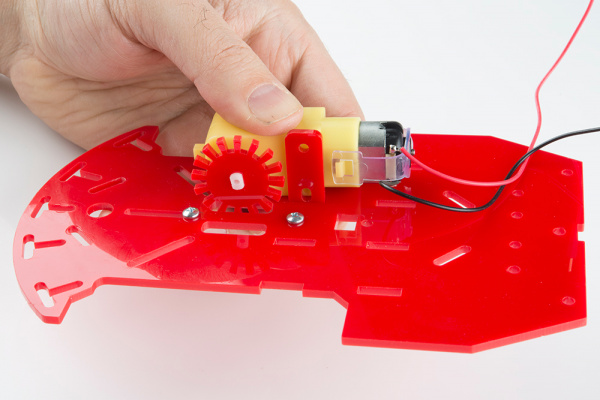
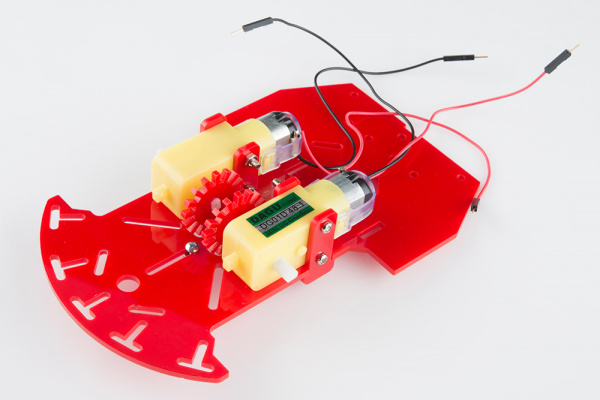
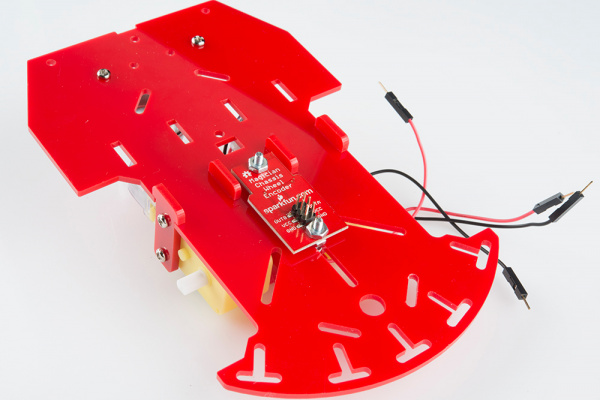
I'm using the same wheel encoders/sensor as described here: https://learn.sparkfun.com/tutorials/re ... mbly-guide (I'm using blue chassis, but the encoder disk is the same as in pictures in that guide - 16 teeth). I'd like to use the data from encoders to calculate proper PWM values to make it go (at least roughly) straight, however, I'm getting irregular readings.

If I attach the interrupt to RISING or FALLING I'm not getting 16 ticks per each full wheel revolution...more often it's less than that. Normally I'd expect to have some false ticks which I'd then filter out, but instead of this it seems not to register some proper ticks.

Anyone here has experience with this gear? Is it just not accurate enough or it needs some special treatment (checking teeth/sensor distance etc)? I'd also love to find some info on how does it work exactly: as far as I know, the sensor consist of two IR sensor - when exactly should it produce HIGH/LOW? What can affect it?
By Valen
#177825
It may not be a nice sharp digital pulse that adheres to the maximum and minimum input voltage levels for a certain high or low. I suggest you assume it is an analog wave. Maybe it looks like a sinewave that has only a medium amplitude and not centered halfway the input voltage range. To get a feel for the peaks write a bit of code that measures the analog voltage and send this to the serial monitor. As I doubt you have an oscilloscope to view the waveform. Probably requires slow turning to get the maxima values.
By Mee_n_Mac
#177840
I wonder if 'coloring' the teeth might help. I infer from the pics that the 2 IR detectors are looking straight down at, vs through, the teeth via slots in the chassis. If that's true then each is seeing the same red surface, only closer or farther away as the sprocket wheel thingee turns.
Image
Perhaps coloring the 'valleys' (of the sprocket wheel thingee) black (ie - non-reflective) and the 'peaks' white or silver might help.
Image
Image
Image
Image
By BartAdv
#177861
Thanks for the tips, I did some wrong calculations and my real problem is that I more often have extra ticks than missing ticks. I will first try filtering some short transients in my ISR, and if that doesn't help I will just connect it to analog input and monitor the values. Don't have the oscilloscope, you think analog input would be precise enough for that? While having that connected I will also try the coloring (so that at least I will see whether it has some effects or not).

Sounds like a plan!
By Valen
#177872
The analog measurement unit has 10 bit resolution, or 1024 steps. About halve as precise as most cheap multimeters. I haven't looked at the redbot lib, but it doesn't get any better through the code. Also, most cheap digital oscilloscopes have 8 bit resolution per vertical range setting. Only with analog oscilloscopes might you be able to see smaller jiggles. However, their accuracy is often in the order of a few percent. So it has to be taken with a grain of salt.

It's all about turning the wheel slowly manually if you want to investigate the limit and halway point of the waveforms. Perhaps make the motor run slowly as a start. Do realise that sending to the serial port takes much longer than an analogread measurement. So generally speaking serial communication has a big part in the duration of a loop period. It will reduce your rample rate substantially.
By Valen
#177873
... I will first try filtering some short transients in my ISR, and if that doesn't help I will just connect it to analog input and monitor the values. ...
That is putting the cart before the horse if you ask me. Before you filter something out, you need to know what it looks like first.
By BartAdv
#177892
Got some preliminary readings, although the frequency leaves much to be desired, need to fix it (by sending bytes rather than text, too much overhead):

Image

The vertical range seems OK, from around 40 to 1000+ (although it's interesting for non moving encoder the reading is around 700, don't know what this come from, I'm not knowledgeable about this sensor).

The horizontal line labels are in 10ms unit.

Clearly there are places where it goes down and then again up while being on 'rising' edge, but it seems those fluctuations are not that instant and depending on the rotation speed: on this picture, the gaps are around 30ms from falling point to the point of returning to high, whereas in faster-movement readings they are shorter or even disappear due to low frequency of main loop.

Like I said I'm planning to fix the reading loop to get higher frequency, in the meantime two questions:
- why the voltage reading for non moving encoder is constantly around 700?
- what could cause those 'bad' fluctuations to depend on the encoder speed?
By Mee_n_Mac
#177911
BartAdv wrote:The vertical range seems OK, from around 40 to 1000+ (although it's interesting for non moving encoder the reading is around 700, don't know what this come from, I'm not knowledgeable about this sensor).
...
Like I said I'm planning to fix the reading loop to get higher frequency, in the meantime two questions:
- why the voltage reading for non moving encoder is constantly around 700?
- what could cause those 'bad' fluctuations to depend on the encoder speed?
You've piqued my curiosity. Here's one of 2 identical detector circuits.
RedbotCogDetectorCkt.jpg
Since the optical part's DC behavior is blocked from the output by C2, the answer to one of your questions can be found be simple analysis of Q1. It's biased at ~0.63 V by R3 and R4. That means Q1 is maybe, just barely conducting. Depending on the temp and Q1's beta, a small current may be flowing through the CE junction and therefore also through R5. If you're reading 700 (out of 1023 = 5 V) then that current must be ;

5 - I*4700 = 5 * 700/1023 or ...

I =~ 0.33 mA. That sounds pretty reasonable to me given the itty bitty biasing.

As for the time dependent behavior ... I'd have to look at the FOV of the sensor and make some guesses as to the reflectance of the cog thingee.
You do not have the required permissions to view the files attached to this post.
By Valen
#177916
Am I correct in understanding that the reflective sensor measures 'the depth' of the teeth? It looking radially into the crest of the teeth. That seems what Mee_n_Mac is thinking also.

False reflections is also my suggestion for the jiggles on the rising and falling edges. Seeing as the plastic looks quite smooth and specular (like a mirror). Though you would think the teeth would be machined somehow and should have a rougher surface, but the photo's shown do not allow that detail to be seen. As the teeth turn over it the wide angle light emitted hits the flanks of the teeth (or even multiple teeth perhaps) and could cause multiple reflections before it hits the sensor. Which seems also to have a wide field of view.

See datasheet:
https://www.fairchildsemi.com/datasheets/QR/QRE1113.pdf

I'm not sure how much room there is to reduce the field of view. Putting some IR-opaque tape (shine a remote control through it and look at it with a mobile phone/ camera) across it making a slit would do. But is probably hard due to the size of the sensor. Alternatively I suggest roughing up the flanks of the teeth (by sanding with fine grit paper) to reduce specular reflections, and painting the tops and crests alternately black and white.
By Mee_n_Mac
#177942
Just for kicks and because I had LTspice already running ....

I put the above circuit, modified a bit, into the sim to see what I might get for an output waveform. What I got is so different from the actual, posted above, output that it further intrigued me. But first the simulated circuit.

I traded the normal opto-detector for an opto-coupler. I figured any switching speed differences between the devices is unimportant given the circuit. Then I thought I could configure the input to the opto to make it's photo-transistor (PT) output something that resembled the real-life behavior of the detector. To that end I injected an emitter current whose magnitude got a PT output the same as I'd expect. Now the QRE1113 datasheet lists a 0.4 mA (typ) Ice (detector) given a 20 mA current through the emitter diode and a mirror 1 mm (the peak response distance) from the emitter. In reality SFE's circuit pumps 38 mA though the emitter but the red plastic cog is probably not as reflective as the mirror nor 1 mm away (at it's closest). So I settled, for the minute, for an sim input current that resulted in 0.5 mA flowing through the sim PT CE junction in a steady state situation (w/o any caps charging up) driving R2. I then figured the rise and fall times of the input current source could be set to mimic the entrance and exit times of a cog peak, into and out of, the FOV of the QRE1113 sensor. ATM I've got 1 msec rise and fall times as a starting point. Obviously wrong as you'll see.
RedbotSpiceCkt.jpg
And here's the sim results plotted out. Note that Vin is a scaled version of the input current. It's magnitude is not as important as it's timing and shape. R1 in this circuit has no real relation to R1 in the SFE circuit. Then note how different the general shape of sim Vout is compared to the measured Vout.
RedbotSimPlt1.jpg
Given how simple the circuit is, I have to believe the sim result is true ... given the input. So my simulated input must be waaaay off. But just looking at it I have a hard time thinking I can change the input enough to get the real life results.

So here's the LTspice .ASC file, renamed as a .TXT, so it'll post. Your turn to play with it.
RedBotDetector.txt
You do not have the required permissions to view the files attached to this post.
By Mee_n_Mac
#177943
Valen wrote:False reflections is also my suggestion for the jiggles on the rising and falling edges. Seeing as the plastic looks quite smooth and specular (like a mirror). Though you would think the teeth would be machined somehow and should have a rougher surface, but the photo's shown do not allow that detail to be seen. As the teeth turn over it the wide angle light emitted hits the flanks of the teeth (or even multiple teeth perhaps) and could cause multiple reflections before it hits the sensor. Which seems also to have a wide field of view.
I'm liking the above explanation and the fix. The sim results show an "oscillation" at the beginning of the response (due to the different charge rates of C1 vs C2 IMO). But not for as long as the real results show.
By BartAdv
#177951
Valen wrote:Am I correct in understanding that the reflective sensor measures 'the depth' of the teeth?
I am still unsure about that, because it doesn't matter if you place anything in front of the sensor - it produces the steady ~750 readings as long as anything moves in front of it. Only when you move something the readings change, but how they change I will post once I will pepare some more meaningful readings.
Mee_n_Mac wrote: Just for kicks and because I had LTspice already running ....
Whoa, thanks for so thorough simulation, I still haven't got a time to prepare more detailed readings, and you've already come with such simulation, niiice!
Your turn to play with it.
Challenge accepted;) just give me some time to understand it all :o Really, many thanks for such an info, one step closer to understand the inner workings of this sensor.
By BartAdv
#177992
OK, one more inquiry: could someone elaborate why it does detect only movement, and not the 'distance'? By doing tests with moving mirror in front of the sensor it looks like it goes to the low voltages only when I move it towards sensor (only fast movement can make it to really low voltages, slow movement makes it go up again to the floating level), and high voltages when moving away (again, only fast movement can make it up to 1023)?
By Valen
#177994
Probably because of that capacitor C2 in the schematic. The resistors R3 and R4 set up the transistor to conduct slightly at some workpoint. The capacitor C2 only passes through varying signals (ac) caused by your moving action. Slow movement or static signals from the photo-transistor part of the sensor is blocked by it.
By Mee_n_Mac
#177995
Strictly speaking it does react to distance but C1 and C2 filter it so that only changes in near distance (0.5-5.0 mm) will be represented at the output. And given the way Q1 is biased, it only amplifies when the distance goes from far to near. So quick motions from far to near make the output go from ~5v to ~0v. Slow motions, in either direction, result in no or little change. Holding the detector board near for a while and then quickly moving it to far results in little change.

You can look at the circuit as having 2 parts joined by C2. On the left (of C2) is the detector and on the right is an inverting amplifier. Ignoring C1 and C2 for a minute, the phototransistor reacts to distance by increasing or decreasing current flow to and through R2. Less distance means more current and that would make more voltage across R2. Add in C1, which has to charge up/down, and so that slows down the voltage changes. This is a low pass filter. So very quick motions result in little change in R2's voltage.

Now look at the Q1 circuit.
http://en.wikipedia.org/wiki/Common_emi ... generation
The wiki explains the operation but let's look at how this one is biased. As said above R3 and R4 set the base voltage to ~0.6v. If the base voltage goes up, more current will flow and Vout will go down (from nearly 5v). If the base voltage goes down from it's bias point, well the current is already 0 or near 0, so not much changes at Vout. Perhaps Vout goes up a bit, but is limited to the 5v supply. So the amp really only amplifies the positive going excursions from the bias point.

Now look at C2. It's a DC blocking cap connecting the 2 parts.
http://en.wikipedia.org/wiki/Capacitive ... g_circuits
Fast changes in the voltage difference (Vr1 to Vbase) are passed through but slow changes aren't. C2 has time to charge up (or down).

The end result is what you see.

Make sense ?

EDIT : R1 above should have been R2 (oops), so it's now changed and correct. Sry.
Last edited by Mee_n_Mac on Mon Dec 22, 2014 7:07 pm, edited 1 time in total.